Red Beans & Rice

Like any other classic Southern dish, Red Beans & Rice recipes (and non recipes) vary and are as unique as the person preparing them. A dish that is steeped in South Louisiana and family traditions, no one makes their red beans exactly the same. Here is my take. Use this recipe as a guide, but know that everything – from measurements to list of ingredients – are all open to interpretation. Experiment and make it your own!

Red Beans

Let’s start with some history about the dish du jour – don’t worry, the test will be open book. Whenever researching for a recipe (especially one heavily rooted in traditions and variations) I like to look not only at various recipes, but how the origins of the dish came about. Traditionally, red beans & rice was served on Monday. Sunday dinner (Yankees, read “lunch”) was usually a ham, and the leftovers were perfect for the red beans. Monday was also “wash day” where women would spend all day scrubbing clothes. By hand. I guess I should stop griping to The Man about my outdated washing machine….I could always be washing by hand! Red Beans & Rice was an “easy” dish that could sit on the stove all day and make for a yummy supper (Yankees, read “dinner”) at the end of a long soggy day.

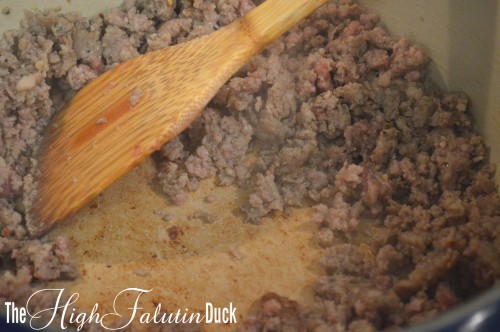
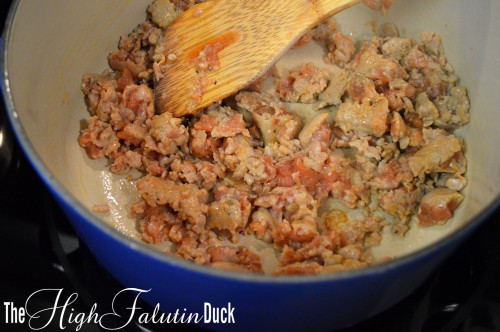
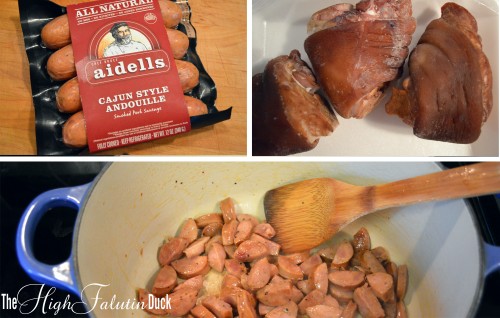
History lesson over (you all get an A). Now to talk about ingredients. As mentioned above, leftover ham is ideal. But personally, I don’t bake a ham every Sunday….I might bake 2 a year. So let’s consider the other options. Store bought ham, bacon, sausage, ham hock, salt pork, pickled pork….do you see the trend here? Pig. Cured pig of some sort. You can find recipes using various combinations of the above pork products. Some recipes call for serving the meat on the side. Some call for meat in the beans and a pork chop on the side. I like andouille sausage and smoked ham hocks. That’s assuming it doesn’t happen to be one of two days of the year I’ve made a ham.

Red Beans meat

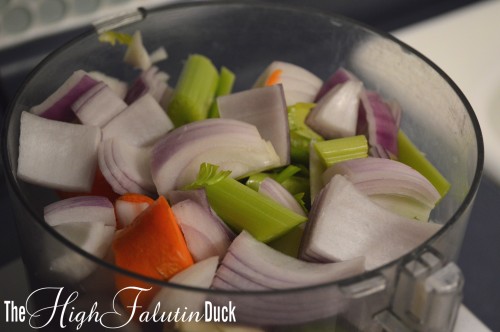
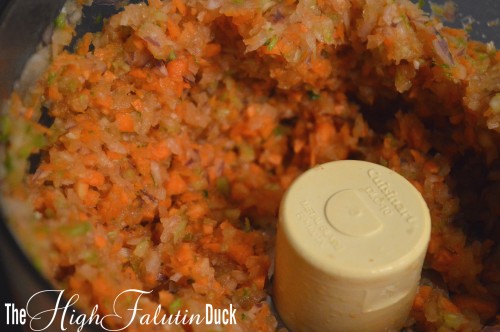
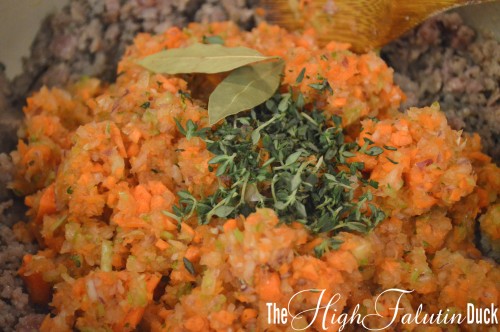
After browning your choice of pig products, we move on to the veggies – onion, celery and bell pepper. I dice mine small so that they melt into the final product – I’m not a fan of vegetable chunks in my red beans. Lightly caramelize the veg in the rendered pork fat and a little butter. Use a fly swatter to shoe away friends and family who may have gravitated towards the kitchen smells – you don’t want anyone drooling on the stove.

Red Beans all in the pot

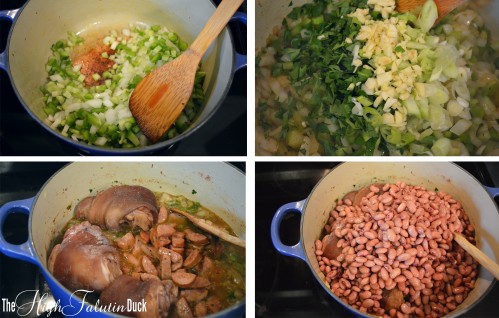
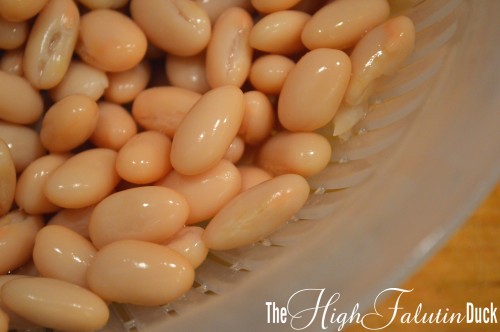
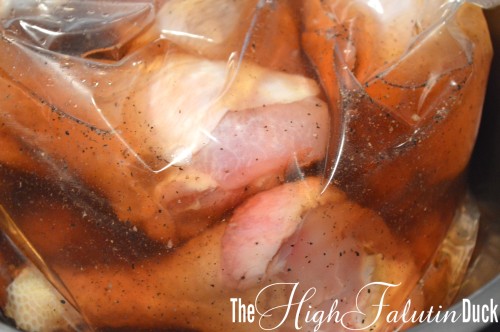
I hope you read this article yesterday and started soaking your red beans….if not, I guess you’ll have to start now and eat tomorrow (or do the quick soak method. Or use canned beans). Personally, I like the small red beans. But kidney beans, or a combination of both, works great too.

Red Beans Bring to a boil and reduce to simmer

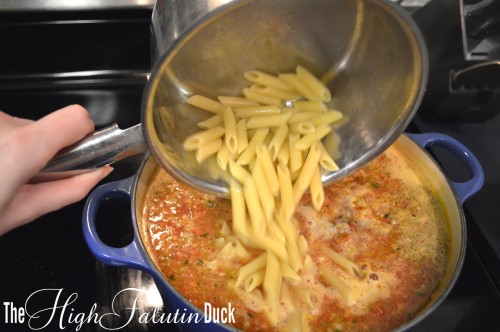
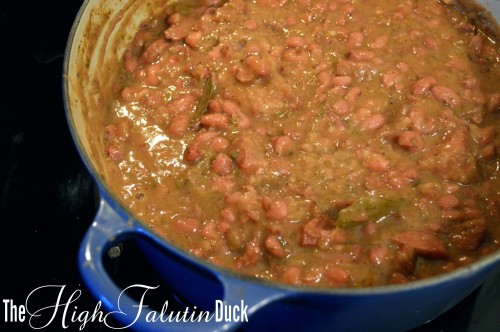
Deglaze your pan with a cup of stock. Scrape up any flavor stuck to the bottom, then add all your ingredients to the pot – meats, beans, liquid, herbs and spices. Bring it to a boil, reduce to a simmer, and let it go for about two hours. Or maybe three. Four? The beans are done when they’re done….so sit back and relax. But come back to stir and drool from time to time.

Red Beans half way through

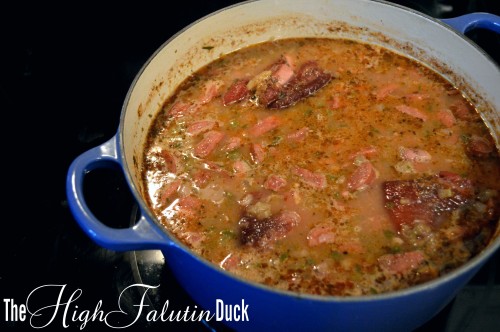
I want my red beans to be melt in your mouth creamy. A long, slow, consistent cooking time should guarantee this. But if you want to speed it along, you can mash up some of the beans. Also keep an eye out for dry beans – don’t be afraid to add some more liquid as needed. If you don’t happen to like creamy red beans, and want a little more bite to them, you might want to consider reducing the amount of liquid. You can always add more later.

Red Beans

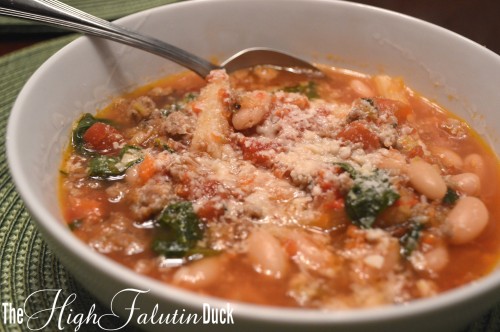
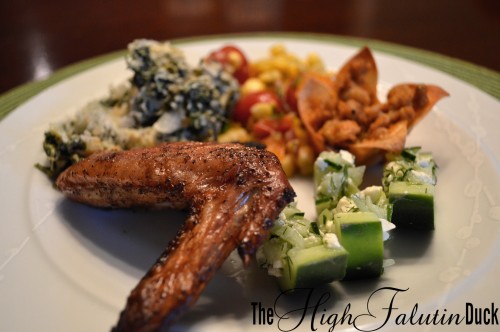
Now it’s time to serve! Because there’s so much flavor packed it the red beans, I like to keep the rice simple. A little butter, salt and a bay leaf. Scoop some rice in your bowl and top it with a generous portion of the beans. Sprinkle it with some green onion (or chives) and serve with a bottle of hot sauce.

Red Beans Over Rice with Corn Bread

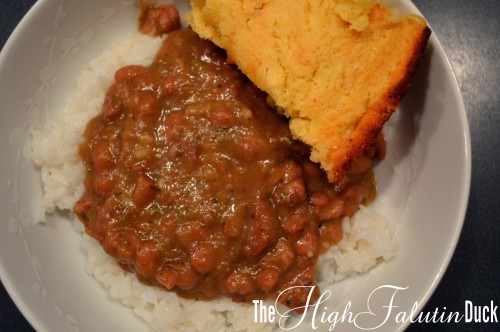
Notice that I didn’t garnish my red beans with any highfalutin greenery. Not that I’m opposed! But it was the final minutes of a very nerve-racking Saints and Patriots game. I scrambled to fix my plate (you folks are lucky to have a final picture!) after Kenny Stills caught a touchdown pass to give the Saints a 1 point lead in the final 3 minutes! We won’t talk about what happened after that…..but at least I enjoyed my red beans!

Red Beans & Rice

  • 1 Lb. small red beans (dried)
  • 1 Lb. Andouille sausage, sliced
  • 1 Lb. smoked ham hocks
  • 1 T. butter
  • 1 onion, diced
  • 2 stalks celery, diced
  • 1 green bell pepper, diced
  • 3 cloves of garlic, minced
  • 1 – 2 green onions, minced
  • 1/4 C. parsley, minced
  • 1 tsp. cayenne pepper
  • 1 T. oregano (dried)
  • 2 – 3 tsp. Cajun seasoning
  • 3 – 4 bay leaves
  • 3 C, chicken stock
  • 3 C. water
  • salt and pepper, to taste

In a large pot, cover dried beans with water. Cover and soak over night. Drain and set aside.

In a large Dutch oven (or heavy bottomed pot) sauté sausage. Remove, leaving behind drippings. Add in the butter and sauté onion, celery and bell pepper until lightly caramelized. Add in garlic, parsley, green onions, dried herbs, spices, salt and pepper and sauté for 1-2 minutes.

Deglaze the pot with 1 cup of the chicken stock. With a wooden spoon, scrape the bottom of the pot. Pour in water, stock, ham hocks, sausage and beans. Bring to a boil, then reduce to a simmer. Cook (uncovered) for 2 to 4 hours, or until desired consistency is reached. If needed, smash some of the beans in the last half hour of cooking.

Serve over white rice with Corn Bread.

Ya’ll want my Corn Bread recipe?? It’s pretty darn good….

Sweet Skillet Corn Bread

  • 1 T. butter
  • 1 C. yellow corn meal
  • 1 C. flour
  • 2 ears of corn, kernals scraped
  • 4 tsp. baking powder
  • 1/4 C. sugar
  • 1 tsp. salt
  • 1 egg
  • 2 T oil
  • 1 – 2 C. buttermilk

Preheat oven to 425F. In a seasoned cast iron skillet, heat butter over medium high heat. Butter should be very hot, but not smoking. In a large bowl, combine dry ingredients and corn kernels. Whisk in egg and oil. Add 1 cup of buttermilk and stir. Slowly add more as needed until consistency is thick but smooth. Pour batter into hot skillet and smooth out the top. Transfer skillet to the preheated oven, and bake until golden brown and cooked through (about 25 minutes). A toothpick inserted in the center should come out clean

Minestrone Soup

When you think about your favorite dishes, I doubt soup comes to mind. But this soup is about to change that – Minestrone is a hearty Italian soup full of vegetables, beans, pasta and topped with parmesan cheese. This version has sausage too!

The complete recipe, with measurements can be found at the bottom of the post

 minestrone soup

A few years back, I would watch Tyler Florence’s show every Saturday morning – almost religiously. The only reason I don’t watch it now is because it’s no longer being aired (and because a certain 3 year old has commandeered my TV remote…). One of his shows featured a recipe for Hunter’s Minestrone – and wow did it look good! I had always liked the thought of minestrone, but too often the actual soup was lacking – the vegetables were watery and bland, the broth was boring….but Tyler’s version was very promising! And it did NOT disappoint.

As with any recipe I make regularly, this one has met some modifications over the years….not enough to claim this recipe as “mine”, but enough to make an excellent recipe a little bit better (and easier to prepare).

First off Tyler wants you to steep you chicken stock with a whole head of garlic. Then he wants you to throw the garlic away! What!? I have to dirty a third pot AND trash the garlic? No thanks….instead I add the garlic into the vegetable medley.

rough chopped veggies

chopped veggies

Pulse the vegetables until everything is finely chopped, but not obliterated. The minced veggies give the broth a thicker consistency, which really makes this recipe stand out from other minestrone recipes I have tried.

sausage

Now for the sausage (and yes, this is the third post in a row that features sausage….but who’s counting?). I never have fresh sage on hand. I don’t grow it and I rarely use it. So instead of buying and chopping fresh sage, I buy Jimmy Dean’s sage sausage. This saves a little time and money and doesn’t affect the end result. But if you are a big fan of sage, by all means use it!

sausage, vegetables, herbs

After the sausage is nice and brown, it’s time for those veggies. Add them to the pot with salt, pepper, thyme and bay leaves and crank the heat up to high. The vegetables are full of water, which needs to be cooked out. Stir regularly and watch for most of the liquid to evaporate. Next we add the stock, beans and tomatoes.

cannellini beans

My go to brand of processed tomatoes is Pomi. They are imported from Italy and come in a cardboard box. They are a little more than a can of Hunt’s, but you get what you pay for – which in this case is less…which is good! The only ingredient in a box of Pomi tomatoes is…get ready for it….tomatoes! No citric acid, no salt, no nothing. And you can taste the difference. My store sells 2 styles – chopped and strained. Strained is like sauce, and the chopped are…well they are just chopped. I use the chopped for this soup.

Pomi tomatoes

Allow the soup to come up to a boil, then turn the heat down low. You want it to simmer for about half an hour. Next we’ll add in the pasta and a few cups of fresh greens. If I was buying something specific for this dish, I would get spinach. But I often use what I already have – today I have mixed baby lettuces.

pasta in soup

mixed greens

Allow the pasta and greens to cook in the pot for at least 5 minutes – then it’s time to serve. I like mine with a sprinkle of fresh parmesan and a few grinds of black pepper.

2 carrots, roughly chopped
2 stalks celery, roughly chopped
1 onion, roughly chopped
2 garlic cloves, smashed
1 lb. Sage sausage
1 T. Fresh thyme, chopped
2 bay leaves
2 qts. Chicken stock
1 box Pomi tomatoes (or large can diced tomatoes)
2 cans cannellini beans, drained and rinsed
1/2 lb pasta, cooked and drained
2 – 3 C. Fresh greens (spinach is best)

Pulse celery, carrots, onion, and garlic in a food processor until minced (but not pureed).

In a large pot, brown sausage in 2 tsp. of olive oil. Use a wooden spoon to break it into small pieces. Once it is all browned, add in the vegetables, salt, pepper, thyme and bay. Allow moisture to cook out of vegetables, then add in stock, beans, and tomatoes.

Bring to a boil, and simmer for 30 minutes. Add in the pasta and fresh greens. Allow to cook for another 5 minutes. Serve into bowls, garnish with fresh parmesan.

Note : This soup can be frozen. But I prefer to leave out the pasta if I intend on freezing it. Then I add it in when ready to reheat.

The Lighter Side of Football Fare

football fare

Despite my team being out of it, the NFL playoffs have made for some exciting TV the last couple weekends. And for me, good football pairs nicely with good food (and cold beer). But the go-to grub for a football spread tends to be fried, fattening, and void of some key food groups. If celery with ranch is the only vegetable on your spread, then your spread needs some work! And don’t worry – I’m not about to spring some lentils or tofu on you. And I wouldn’t even call this “healthy” food – it’s just good food….that won’t be hanging on your thighs/gut after the Super Bowl! So here is the spread – grilled Teryaki Chicken, Cucumber Boats, Baked Spinach & Artichoke Dip, Grilled Corn & Avocado Salsa, and Buffalo Chicken Sausage in Wonton Cups.

Teryaki Chicken

We gotta have some wings. But they don’t have to be fried, and they don’t have to be dripping in a sauce whose main ingredient is butter (although, we will use some of that sauce towards the end of the post). Chicken is a clean slate for flavor – if you want flavor, you need to add it yourself. I started with wings and legs in a brine – salty and sweet, a brine will infuse the meat with moisture and ensure the end result is super tender. It’s ideal to brine the meat over night. But even 2 to 3 hours in a brine is better than none at all.

brining chicked

Take the chicken out of the brine about an hour before cooking time. This gives the meat a chance to rest, and for your dry rub to get comfy. The rub needs to compliment the finishing glaze – which for me is teryaki. So a simple rub of salt, pepper, and Chinese Five Spice will do. Coat the meat, and rub it in good. Let the meat hang out in the fridge, uncovered, until it’s time to cook.

Speaking of cooking – it’s time to fire up the grill! I use a gas grill because of easy/quick start up and very little clean up. If you are using charcoal, put your coals only on one side – we want to be set up for indirect heat. I start my grill on high and let it warm up. Then I turn 1 burner off, and 1 burner to medium-high. Put the chicken over the off burner, and leave it be. It will need to be turned eventually – but don’t mess with it too much. I’d say every 15 minutes, give the pieces a turn. If you are impatient, or just really don’t have the time – go ahead and grill them on direct heat. But the indirect method will yield a crispy skin and tender meat – simulating a fried wing, without all the fat.

Once the meat is thinking about divorcing itself from the bones, it’s time for the glaze. Turn your burner back on, and up to about medium (or just move the meat over your coals, if using a charcoal grill). Brush the wings and legs with the teryaki glaze, and allow it to cook for a minute I like the glaze to get cooked on, with some crispy bits – but be careful, the glaze can burn.

teryaki grilled wings

  • 6 wings
  • 6 legs
  • Brine
  • Dry rub
  • Teryaki glaze (store bought)

Brine

  • 4 C. Water
  • 1/4 C. Salt
  • 2 T. Soy sauce
  • 1/4 C. sugar
  • 1 tsp. Pepper
  • 1 tsp. Tabasco sauce

Combine all ingredients. Whisk until sugar and salt are dissolved. Pour over chicken and seal in a zip-lock bag. Allow to marinate at least 2 hours, but preferably overnight.

Dry Rub

  • 2 tsp. salt
  • 2 tsp. pepper
  • 1 tsp. Chinese 5 Spice

Cucumber Boats

cucumber boats

If you ever look at Pinterest, then you have seen this recipe from Bite Delite. It looks fresh and flavorful, so I’m giving it a try! It seems an easy addition to our spread. I made some minor changes though. First, I added a little garlic infused olive oil. I aslo added a squeeze of lime juice. I also assembled the boats a few hours in advance. I put the unsliced, filled cucumbers on a plate, and wrapped tightly with plastic wrap. This helped to keep the filling in place when I sliced them.

Spinach & Artichoke Dip

spinach & artichoke dip

WARNING! This dip may vanish in front of your eyes. For real…If you are having a big crowd, you may want to double up the recipe. If you have friends like mine (you know who you are!) you may want to triple it. And how is this “lightened” up, you may ask? Yes, it has mayonnaise and full fat sour cream….but is has twice the amount of vegetables, and half the amount of parmesan cheese as the Joy of Cooking Baked Artichoke Dip recipe.

Make sure that you don’t buy “marinated” artichoke hearts. They are swimming in olive oil, and we don’t want that for this recipe. I buy the quarters, and rough chop them. But feel free to leave them in quarters, if you prefer. This is easily made in advance, just leave the bread crumbs off until ready to bake.

  • 1/4 C. onion, minced
  • 1 garlic clove, minced
  • 1 tsp. olive oil
  • 1/2 C. Mayonnaise
  • 1/2 C. Sour cream
  • 1 14 oz. can artichoke hearts, chopped
  • 1 10 oz. package frozen spinach, thawed and drained
  • 1/2 C. Parmesan, grated
  • 1/4 C. Panko breadcrumbs

Saute onion in olive oil until softened. Add in garlic, and saute for another 2 minutes. Combine Mayo, sour cream, onion mixture, artichokes, spinach, and parmesan. Season with salt and pepper. Pour into a greased baking dish. Top with bread crumbs. Spray lightly with cooking spray. Bake at 400°F for 20 minutes. Dip should be bubbly and starting to brown. Serve with crackers, tortilla chips, or warm pita bread.

Grilled Corn & Avocado Salsa

grilled corn & avocado salsa

This is a salsa that I like to make on Taco Night (AKA Margarita Thursday). It’s so colorful, and pops with flavor – the perfect topping to a grilled steak taco….man, I should make some grilled steak tacos soon…. But I always end up with too much of this stuff and find myself hovering over the bowl, with a bag of tortilla chips – it’s too good to let it go to waste! So  today I’m skipping the tacos, and going straight to hover mode.

Feel free to change things up – add some jalapeno, different colored peppers, maybe roasted garlic? But don’t make too much – you don’t want leftovers. Avocados just don’t jive the next day – the texture changes, the browning sets in, and they just start to get funky.

  • 4 ears of corn
  • 1 orange bell pepper, quartered (ribs and seeds removed)
  • 1/2 red onion, sliced into thick rings
  • 1 avocado, diced
  • Cherry tomatoes, halved
  • Cilatro
  • Lime juice
  • Olive oil
  • Salt, pepper, cumin to taste

Brush corn, onion and pepper with olive oil and season with salt and pepper. Grill until corn is cooked through and other veggies are soft. Allow to cool. Cut the corn off of the cob and rough chop onion and pepper.

In a bowl combine corn, onion, pepper, tomatoes, avocado and cilantro. Squeeze the juice of two limes directly into the bowl and drizzle with olive oil (1 – 2 T.). Season with salt, pepper and cumin. Mix thoroughly. Refrigerated until ready to serve.

Buffalo Chicken Sausage in Wonton Cups

Buffalo Chicken Sausage Wonton cups

A few years back my mother-in-law made these Bob Evans sausage cups for a Thanksgiving appetizer. They flew off the plate. But they were a little on the heavy and salty side. I’m using the Bob Evans concept, but I’m lightening it up a little. First change, I’m not using Bob Evans sausage….sorry Bob.

  • 24 Wonton wrappers
  • 1 lb. chicken sausage, removed from casings (spicy, if desired)
  • 1 C. Mexican blend, shredded cheese
  • 1/4 C. yogurt Ranch dressing
  • 1/4 C. buffalo hot sauce (Frank’s)

Lightly spray a mini muffin tin with cooking spray. Line each cup with a wonton skin, to form little cups. Bake at 350F for 5 minutes, until lightly browned.

Saute sausage, breaking into small pieces with a wooden spoon. Drain. Combine cooked sausage, Ranch dressing, buffalo sauce, and cheese. Scoop filling into wonton cups, and bake at 350F for 10 minutes (or until bubbly).

Tortellini with Chicken Sausage & Brussel Sprouts

chicken sausage and pesto pasta

I have a love/hate relationship with Pinterest. On the love side, it’s a great place to find inspiration, and to organize your (I mean other people’s…) ideas. On the hate side – clicking a pin that takes you to another “pinning” site, that takes you to another website, that links to the “original” post….and after 47 clicks you still haven’t found the recipe you were looking for. Jeeze…now I’m irritated. Thankfully that doesn’t happen as often as my real Pin-Peeve – gorgeous pictures accompanied by bland, boring recipes.

brussel sprouts

sausage

I kept encountering this delicious looking picture on Pinterest. It was a recipe for chicken sausage, roasted brussel sprout and pesto pasta – it looked amazing, and sounded healthy! What could go wrong!? A recipe that was not nearly as exciting, THAT is what could go wrong. It wasn’t terrible, and it was a good starting point. But I knew that with only a little more effort (and some additions) this so-so dish could be a great dish!

  • 1 lb. Cheese tortellini, cooked to package instructions
  • 1 lb. Chicken sausage, casings removed1 T. butter
  • 1 onion, thinly sliced
  • 2 T. Fresh thyme
  • 1 lb. Brussel sprouts, trimmed and sliced
  • 4 cloves garlic, minced
  • 1/2 C. Chicken stock
  • 1/4 C. Pesto
  • Handful of pinenuts, lightly toasted
  • Salt & pepper to taste
  • Parmesan cheese, grated

In a heavy bottom pot, brown the sausage in a little olive oil. Break it up with a wooden spoon into bite sized pieces. Once browned, remove with a slotted spoon to drain.

If needed, add a little more olive oil. Add onions over medium high heat, and cook until soft and translucent. Turn the heat to medium, and continue cooking until starting to caramelize (about 10 minutes).

Add in butter, brussel sprouts, thyme and garlic. Season with salt and pepper. Cook, stirring regularly until brussel sprouts are soft and starting to color. Pour in stock to deglaze the pan. Use your spoon to scrape the bottom of the pan. Put a lid on it, turn heat to low for 5 minutes.

Add cooked pasta to the pot and toss to completely combine. Allow the pasta to cook for another minute or two. Remove from heat and gently fold in pesto and pine nuts. Garnish each serving with parmesan and fresh pepper.