There are two things that I always regret ordering at a restaurant – meatballs and fresh pasta. Not to brag, but I make a damn good meatball, and my fresh pasta is fantastic (ok, I totally just bragged…). So I can’t justify paying someone else to serve me a dry, flavorless meatball or gummy, wrongly cooked fresh pasta – I’m almost always disappointed. And it makes me want to go home and make my own!
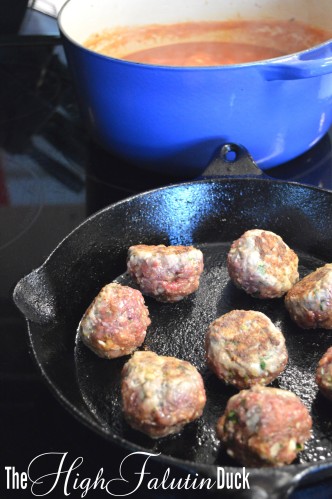
Unlike most meatball recipes, mine does not call for bread crumbs. I know the rational behind adding bread crumbs (or even bread) is to prevent the meatballs from drying out – but dry meatballs are not a problem that I encounter. I think it is because of my preferred cooking method – pan seared then braised in tomato sauce. The browning ensures a good texture, flavor, and stability (ie, your meat stays in a ball) and the slow braise keeps the meat tender and juicy.
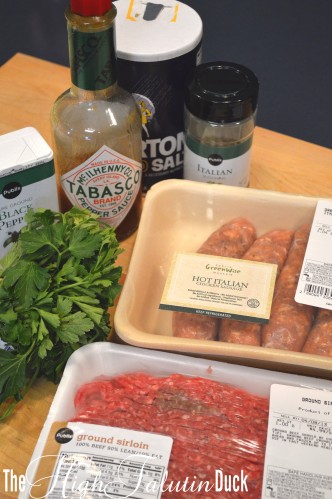
Let’s talk about meat! I like a 50/50 mix of lean ground beef and Italian sausage (I used hot chicken today, but sometimes use pork sausage). The fat ratio is good (not too fatty, but enough to hold your balls together and retain juiciness) and you are giving yourself a head start on the seasonings with the sausage. Ground veal is another popular option for meatballs, but it is not my preference. The price is too high, and the positive impact it makes on the meatball is too low to justify paying the price – or killing a baby cow for that matter. Now bring on a tender veal chop, and I’ll overlook the baby butchering…
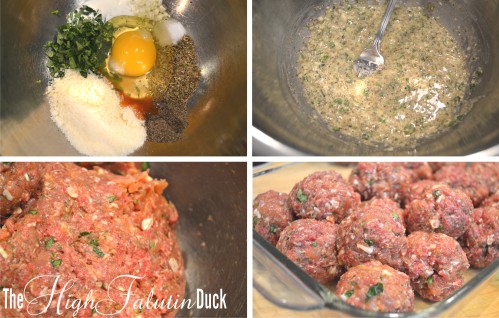
Take off your rings, trim your fingernails, and get ready to be wrist deep in meat – because the best way to mix your meatballs is by hand. Similar to making hamburgers, you want all of your flavors evenly distributed. You also don’t want to over work the meat. Hands are the perfect tool for ensuring both. I start by mixing my seasoning, cheese, cream and egg (do this with a fork or a whisk). Then add in the meat and get to work. Once you are happy with the meat mixture, start to form the balls.
You may be wondering does size really matter? No, not really (not with meatballs anyways…). I like about 1 inch round balls, but feel free to go big (or small, if that’s how you roll). Just keep in mind that with larger meatballs, they will need a longer time braising in the sauce. If you are planning on letting your sauce simmer all day (which isn’t a requirement, but it is a good idea!) then this isn’t a problem.
Before you start cooking the meatballs, make your sauce. After they are browned, you’ll want to transfer them into the simmering sauce. If you have a go-to tomato sauce recipe, then use it. If you need a new favorite, use mine (recipe below)! But God forbid, do not dump a jar of Ragu in a pot. These meatballs deserve the best, and the best is homemade.
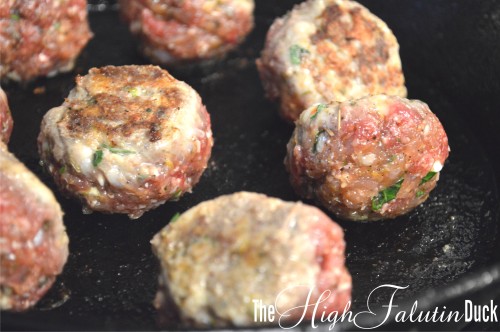
The ideal pan for browning the meatballs is a cast iron skillet. If you don’t have one, go buy one use a nonstick skillet. Heat the pan over medium heat and add about 2 teaspoons of olive oil. Take your time with the browning and don’t crowd the pan. It will take a few minutes per side to get a nice caramelized crust. If you go to check or turn your meatballs and they stick, wait a minute or two longer – once they are good and browned they will come right off. Move the browned meatballs over to the sauce, and give it a stir to make sure they are completely submerged.
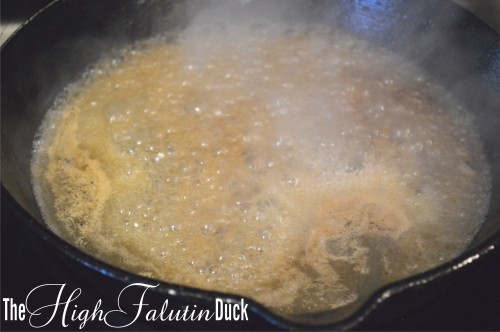
Once all of your meatballs are browned and transferred to the sauce, you may notice some little bits of seasoned meat stuck to your pan. We don’t want to lose those – that is some good flavor right there! Turn the heat off and pour a little chicken stock (or water. Or red wine….no judgment here) in the pan to deglaze. With your wooden spoon, scrape up all the stuck on bits. Now pour it into your sauce with the meatballs. Give it a good stir, and leave it to simmer for the next couple of hours.
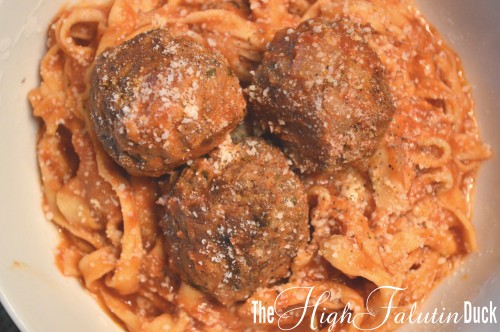
I like my meatballs served over a nest of fresh pasta and sprinkled with Parmesan cheese. Sorry, I don’t have a tutorial on making fresh pasta yet. I’ll need to grow a third arm or entrust The Man with the photography duties before I can feature a post about it. I’ll work on both…. But in the meantime, use the pasta that you prefer.
Meatballs
- 1 Lb. lean ground beef
- 1 Lb. Italian sausage (hot chicken)
- 1 egg
- 2 T. Parmesan cheese
- 2 T. Italian parsley, minced
- 1 T. garlic, minced
- 1 T. Italian seasoning (dried herbs)
- 2 tsp. black pepper
- 1 tsp. salt
- 1 tsp. cream (can use 2% or whole milk instead)
- 1/2 tsp. Tabasco sauce
- 2 tsp. olive oil
- Tomato Sauce
- 1/2 c. chicken stock
Whisk together egg, cheese, parsley, garlic, herbs, cream, pepper, salt and Tabasco. Add in meats and mix by hand until thoroughly incorporated. Form into balls (about 1″ round) and refrigerate until ready to cook.
In a cast iron skillet, heat oil over medium. Brown meatballs on all sides. Do not over crowd the pan, work in batches if necessary. Once browned, transfer meatballs to simmering tomato sauce. Stir to cover.
After all meatballs are browned and transferred to sauce, pour chicken stock into skillet. With a wooden spoon, scrape up any meat that is crusted onto the pan. Pour chicken stock into tomato sauce and stir through.
Allow meatballs to simmer in sauce, uncovered on low heat for at least 1 hour. For best results, simmer for 3 to 4 hours.
Tomato Sauce
- 2 tsp. olive oil
- 1 onion, diced
- 3 cloves garlic, minced
- 2 T. thyme, minced
- 1/2 to 1 tsp. red pepper flakes
- 1 box Pomi strained tomatoes (or 28 oz. can pureed tomatoes)
- 1/2 C. water
- 2 T. brown sugar
- salt and pepper to taste
In a dutch oven or stock pot, heat olive oil over medium-high heat. Add in onion and saute until translucent. Add in garlic, thyme and red pepper flakes. continue to cook until onions are lightly browned. Pour in tomatoes and water. Stir in brown sugar, salt and pepper. Bring to a boil then reduce to a simmer.
 Yes, this is healthy bread that’s full of