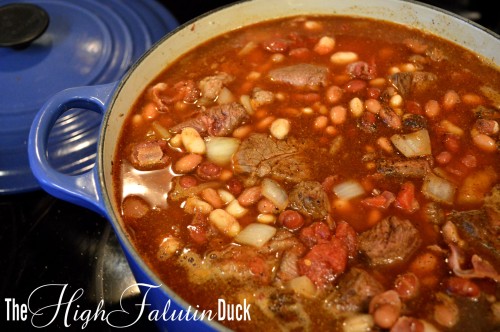
Red Beans & Rice

Like any other classic Southern dish, Red Beans & Rice recipes (and non recipes) vary and are as unique as the person preparing them. A dish that is steeped in South Louisiana and family traditions, no one makes their red beans exactly the same. Here is my take. Use this recipe as a guide, but know that everything – from measurements to list of ingredients – are all open to interpretation. Experiment and make it your own!

Red Beans

Let’s start with some history about the dish du jour – don’t worry, the test will be open book. Whenever researching for a recipe (especially one heavily rooted in traditions and variations) I like to look not only at various recipes, but how the origins of the dish came about. Traditionally, red beans & rice was served on Monday. Sunday dinner (Yankees, read “lunch”) was usually a ham, and the leftovers were perfect for the red beans. Monday was also “wash day” where women would spend all day scrubbing clothes. By hand. I guess I should stop griping to The Man about my outdated washing machine….I could always be washing by hand! Red Beans & Rice was an “easy” dish that could sit on the stove all day and make for a yummy supper (Yankees, read “dinner”) at the end of a long soggy day.

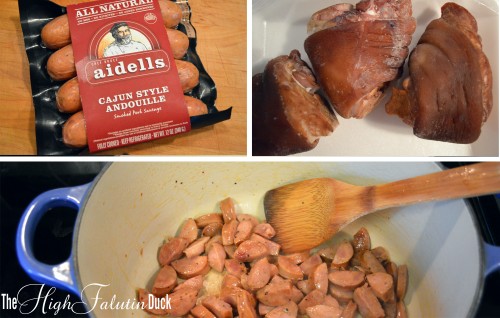
History lesson over (you all get an A). Now to talk about ingredients. As mentioned above, leftover ham is ideal. But personally, I don’t bake a ham every Sunday….I might bake 2 a year. So let’s consider the other options. Store bought ham, bacon, sausage, ham hock, salt pork, pickled pork….do you see the trend here? Pig. Cured pig of some sort. You can find recipes using various combinations of the above pork products. Some recipes call for serving the meat on the side. Some call for meat in the beans and a pork chop on the side. I like andouille sausage and smoked ham hocks. That’s assuming it doesn’t happen to be one of two days of the year I’ve made a ham.

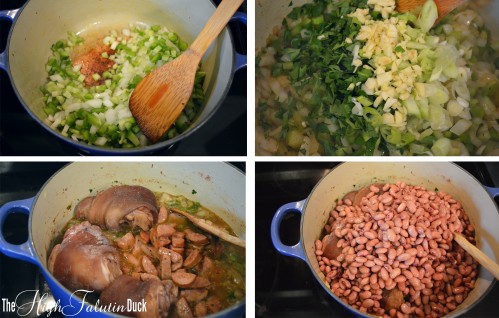
Red Beans meat

After browning your choice of pig products, we move on to the veggies – onion, celery and bell pepper. I dice mine small so that they melt into the final product – I’m not a fan of vegetable chunks in my red beans. Lightly caramelize the veg in the rendered pork fat and a little butter. Use a fly swatter to shoe away friends and family who may have gravitated towards the kitchen smells – you don’t want anyone drooling on the stove.

Red Beans all in the pot

I hope you read this article yesterday and started soaking your red beans….if not, I guess you’ll have to start now and eat tomorrow (or do the quick soak method. Or use canned beans). Personally, I like the small red beans. But kidney beans, or a combination of both, works great too.

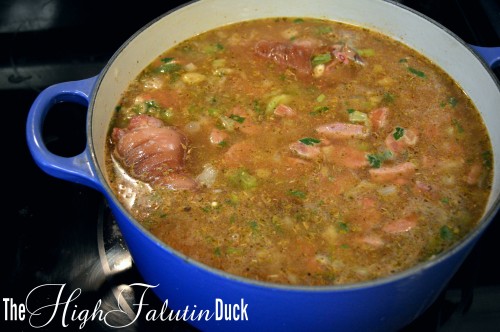
Red Beans Bring to a boil and reduce to simmer

Deglaze your pan with a cup of stock. Scrape up any flavor stuck to the bottom, then add all your ingredients to the pot – meats, beans, liquid, herbs and spices. Bring it to a boil, reduce to a simmer, and let it go for about two hours. Or maybe three. Four? The beans are done when they’re done….so sit back and relax. But come back to stir and drool from time to time.

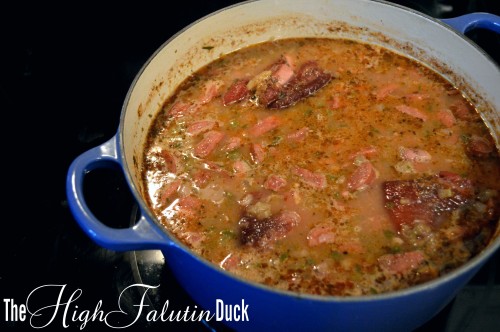
Red Beans half way through

I want my red beans to be melt in your mouth creamy. A long, slow, consistent cooking time should guarantee this. But if you want to speed it along, you can mash up some of the beans. Also keep an eye out for dry beans – don’t be afraid to add some more liquid as needed. If you don’t happen to like creamy red beans, and want a little more bite to them, you might want to consider reducing the amount of liquid. You can always add more later.

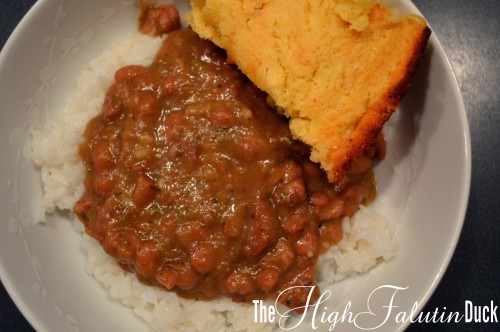
Red Beans

Now it’s time to serve! Because there’s so much flavor packed it the red beans, I like to keep the rice simple. A little butter, salt and a bay leaf. Scoop some rice in your bowl and top it with a generous portion of the beans. Sprinkle it with some green onion (or chives) and serve with a bottle of hot sauce.

Red Beans Over Rice with Corn Bread

Notice that I didn’t garnish my red beans with any highfalutin greenery. Not that I’m opposed! But it was the final minutes of a very nerve-racking Saints and Patriots game. I scrambled to fix my plate (you folks are lucky to have a final picture!) after Kenny Stills caught a touchdown pass to give the Saints a 1 point lead in the final 3 minutes! We won’t talk about what happened after that…..but at least I enjoyed my red beans!

Red Beans & Rice

  • 1 Lb. small red beans (dried)
  • 1 Lb. Andouille sausage, sliced
  • 1 Lb. smoked ham hocks
  • 1 T. butter
  • 1 onion, diced
  • 2 stalks celery, diced
  • 1 green bell pepper, diced
  • 3 cloves of garlic, minced
  • 1 – 2 green onions, minced
  • 1/4 C. parsley, minced
  • 1 tsp. cayenne pepper
  • 1 T. oregano (dried)
  • 2 – 3 tsp. Cajun seasoning
  • 3 – 4 bay leaves
  • 3 C, chicken stock
  • 3 C. water
  • salt and pepper, to taste

In a large pot, cover dried beans with water. Cover and soak over night. Drain and set aside.

In a large Dutch oven (or heavy bottomed pot) sauté sausage. Remove, leaving behind drippings. Add in the butter and sauté onion, celery and bell pepper until lightly caramelized. Add in garlic, parsley, green onions, dried herbs, spices, salt and pepper and sauté for 1-2 minutes.

Deglaze the pot with 1 cup of the chicken stock. With a wooden spoon, scrape the bottom of the pot. Pour in water, stock, ham hocks, sausage and beans. Bring to a boil, then reduce to a simmer. Cook (uncovered) for 2 to 4 hours, or until desired consistency is reached. If needed, smash some of the beans in the last half hour of cooking.

Serve over white rice with Corn Bread.

Ya’ll want my Corn Bread recipe?? It’s pretty darn good….

Sweet Skillet Corn Bread

  • 1 T. butter
  • 1 C. yellow corn meal
  • 1 C. flour
  • 2 ears of corn, kernals scraped
  • 4 tsp. baking powder
  • 1/4 C. sugar
  • 1 tsp. salt
  • 1 egg
  • 2 T oil
  • 1 – 2 C. buttermilk

Preheat oven to 425F. In a seasoned cast iron skillet, heat butter over medium high heat. Butter should be very hot, but not smoking. In a large bowl, combine dry ingredients and corn kernels. Whisk in egg and oil. Add 1 cup of buttermilk and stir. Slowly add more as needed until consistency is thick but smooth. Pour batter into hot skillet and smooth out the top. Transfer skillet to the preheated oven, and bake until golden brown and cooked through (about 25 minutes). A toothpick inserted in the center should come out clean
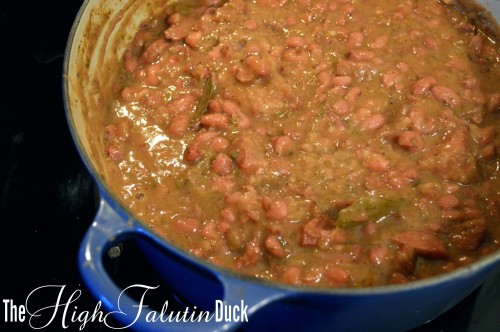
Mmmeatballs

There are two things that I always regret ordering at a restaurant – meatballs and fresh pasta. Not to brag, but I make a damn good meatball, and my fresh pasta is fantastic (ok, I totally just bragged…). So I can’t justify paying someone else to serve me a dry, flavorless meatball or gummy, wrongly cooked fresh pasta – I’m almost always disappointed. And it makes me want to go home and make my own!

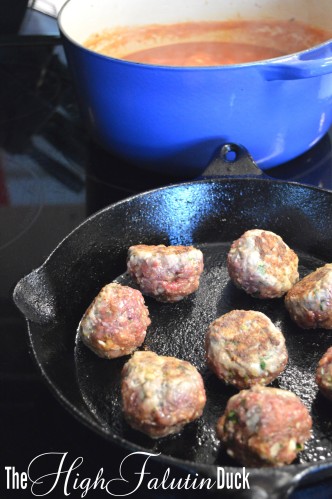
Browning Meatballs

Unlike most meatball recipes, mine does not call for bread crumbs. I know the rational behind adding bread crumbs (or even bread) is to prevent the meatballs from drying out – but dry meatballs are not a problem that I encounter. I think it is because of my preferred cooking method – pan seared then braised in tomato sauce. The browning ensures a good texture, flavor, and stability (ie, your meat stays in a ball) and the slow braise keeps the meat tender and juicy.

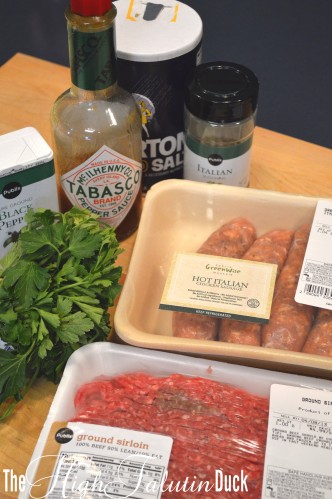
Meatball Ingredients

Let’s talk about meat! I like a 50/50 mix of lean ground beef and Italian sausage (I used hot chicken today, but sometimes use pork sausage). The fat ratio is good (not too fatty, but enough to hold your balls together and retain juiciness) and you are giving yourself a head start on the seasonings with the sausage. Ground veal is another popular option for meatballs, but it is not my preference. The price is too high, and the positive impact it makes on the meatball is too low to justify paying the price – or killing a baby cow for that matter. Now bring on a tender veal chop, and I’ll overlook the baby butchering…
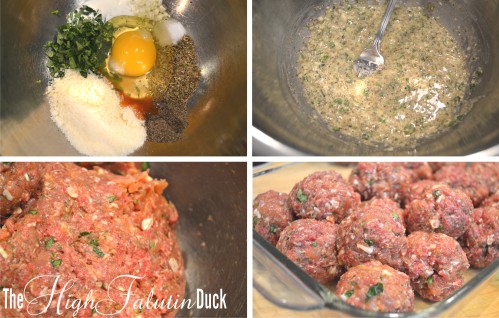
Meatball Mix

Take off your rings, trim your fingernails, and get ready to be wrist deep in meat – because the best way to mix your meatballs is by hand. Similar to making hamburgers, you want all of your flavors evenly distributed. You also don’t want to over work the meat. Hands are the perfect tool for ensuring both. I start by mixing my seasoning, cheese, cream and egg (do this with a fork or a whisk). Then add in the meat and get to work. Once you are happy with the meat mixture, start to form the balls.

You may be wondering does size really matter? No, not really (not with meatballs anyways…). I like about 1 inch round balls, but feel free to go big (or small, if that’s how you roll). Just keep in mind that with larger meatballs, they will need a longer time braising in the sauce. If you are planning on letting your sauce simmer all day (which isn’t a requirement, but it is a good idea!) then this isn’t a problem.

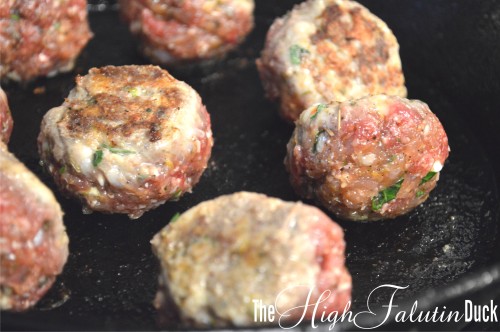
Browning Meatballs2

Before you start cooking the meatballs, make your sauce. After they are browned, you’ll want to transfer them into the simmering sauce. If you have a go-to tomato sauce recipe, then use it. If you need a new favorite, use mine (recipe below)! But God forbid, do not dump a jar of Ragu in a pot. These meatballs deserve the best, and the best is homemade.

The ideal pan for browning the meatballs is a cast iron skillet. If you don’t have one, go buy one use a nonstick skillet. Heat the pan over medium heat and add about 2 teaspoons of olive oil. Take your time with the browning and don’t crowd the pan. It will take a few minutes per side to get a nice caramelized crust. If you go to check or turn your meatballs and they stick, wait a minute or two longer – once they are good and browned they will come right off. Move the browned meatballs over to the sauce, and give it a stir to make sure they are completely submerged.

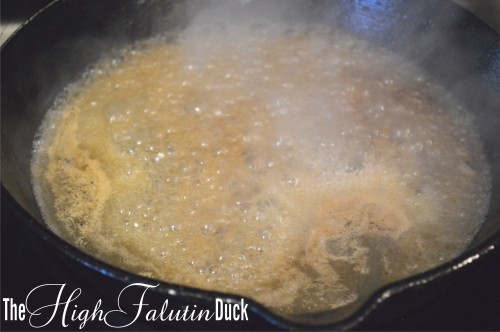
Deglaze

Once all of your meatballs are browned and transferred to the sauce, you may notice some little bits of seasoned meat stuck to your pan. We don’t want to lose those – that is some good flavor right there! Turn the heat off and pour a little chicken stock (or water. Or red wine….no judgment here) in the pan to deglaze. With your wooden spoon, scrape up all the stuck on bits. Now pour it into your sauce with the meatballs. Give it a good stir, and leave it to simmer for the next couple of hours.

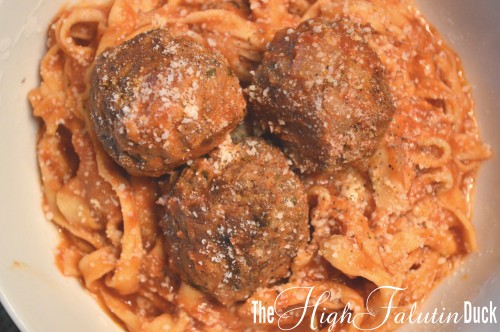
Meatballs

I like my meatballs served over a nest of fresh pasta and sprinkled with Parmesan cheese. Sorry, I don’t have a tutorial on making fresh pasta yet. I’ll need to grow a third arm or entrust The Man with the photography duties before I can feature a post about it. I’ll work on both…. But in the meantime, use the pasta that you prefer.

Meatballs

  • 1 Lb. lean ground beef
  • 1 Lb. Italian sausage (hot chicken)
  • 1 egg
  • 2 T. Parmesan cheese
  • 2 T. Italian parsley, minced
  • 1 T. garlic, minced
  • 1 T. Italian seasoning (dried herbs)
  • 2 tsp. black pepper
  • 1 tsp. salt
  • 1 tsp. cream (can use 2% or whole milk instead)
  • 1/2 tsp. Tabasco sauce
  • 2 tsp. olive oil
  • Tomato Sauce
  • 1/2 c. chicken stock

Whisk together egg, cheese, parsley, garlic, herbs, cream, pepper, salt and Tabasco. Add in meats and mix by hand until thoroughly incorporated. Form into balls (about 1″ round) and refrigerate until ready to cook.

In a cast iron skillet, heat oil over medium. Brown meatballs on all sides. Do not over crowd the pan, work in batches if necessary. Once browned, transfer meatballs to simmering tomato sauce. Stir to cover.

After all meatballs are browned and transferred to sauce, pour chicken stock into skillet. With a wooden spoon, scrape up any meat that is crusted onto the pan. Pour chicken stock into tomato sauce and stir through.

Allow meatballs to simmer in sauce, uncovered on low heat for at least 1 hour. For best results, simmer for 3 to 4 hours.

Tomato Sauce

  • 2 tsp. olive oil
  • 1 onion, diced
  • 3 cloves garlic, minced
  • 2 T. thyme, minced
  • 1/2 to 1 tsp. red pepper flakes
  • 1 box Pomi strained tomatoes (or 28 oz. can pureed tomatoes)
  • 1/2 C. water
  • 2 T. brown sugar
  • salt and pepper to taste

In a dutch oven or stock pot, heat olive oil over medium-high heat. Add in onion and saute until translucent. Add in garlic, thyme and red pepper flakes. continue to cook until onions are lightly browned. Pour in tomatoes and water. Stir in brown sugar, salt and pepper. Bring to a boil then reduce to a simmer.

Herb Crusted Lamb Chops

The traditional meat for Easter Dinner in The Man’s family is lamb. A roasted leg of lamb alongside roasted potatoes, vegetables, and usually some excellent popovers. But since I don’t have  a large family to feed, I skipped the larger leg (or my favorite, the shoulder) and went with some thick meaty rib chops!

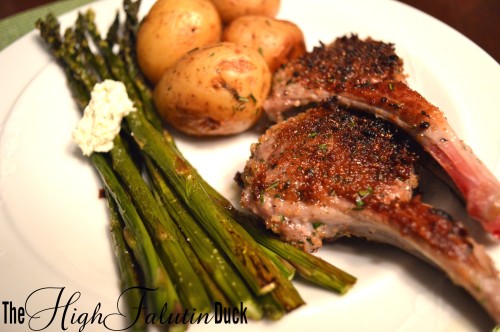
Herb Crusted Lamb Chops

I had some garlic bread crumbs leftover from making Shrimp Scampi the other night. Along with a blend of freshly chopped herbs, I was able to create a crunchy crust for the chops. I went with what I had – parsley, rosemary, and thyme – but I think the addition of mint would have been ideal.

I served the chops with Ina Garten’s Dill Fingerling Potatoes. Although I didn’t use dill or fingerlings….but the cooking method is what’s important here. I went with petite Honey Gold potatoes (but any small potato will work) and topped them with rosemary and garlic. The potatoes cooked in a Dutch oven over low heat for half an hour (no peeking! You want to keep the steam trapped) and come out perfectly fluffy inside with a nice golden outside. Perfect pair for our crusty, juicy chops.

Herb Crusted Lamb Chops

  • 4 lamb chops 
  • 1/4 C. garlic bread crumbs
  • 2 T. mixed herbs, chopped (parsley, rosemary, thyme)
  • 1 T. olive oil

Combine garlic bread crumbs and herbs in a small bowl. Season lamb chops with salt and pepper, and pack bread crumbs onto each side. Set aside. In a cast iron skillet (or non stick) heat up the oil over medium-high heat. Cook the lamb chops 3 to 4 minutes per side (for medium). Remove from heat and allow them to rest for a few minutes before serving.

Corned Beef & Cabbage

Here in Savannah, St. Patrick’s Day is kind of a big deal. The city boasts the largest parade in the country, and people flood this town by the thousands. If you don’t mind a crowd, enjoy people watching, lot’s of bagpipes, and lax open container laws, then you should add Savannah St. Pat’s Parade to your bucket list. However, if you are daunted by overt drunkeness, lack of parking, and over priced hotel rooms….this may not be the scene for you!

Corned Beef & Cabbage

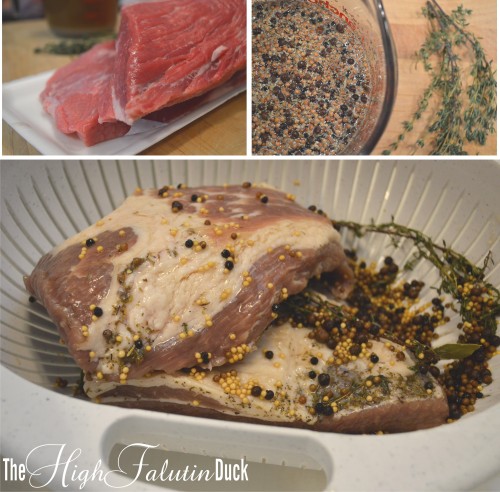
The handful of times I’ve cooked corned beef, I started with pre-brined meat – you know, the shrink wrapped cut of brisket that’s swimming in red slime and comes with a convenient flavor pack? Have you read the ingredients list on that packaging? If not, then don’t…it’s disgusting. This year I decided to step up my corned beef game by doing my own pickling brine. So on Friday morning I started looking at recipes, most of which want you to brine the meat for up to ten days. Ten days!? Damn, and I thought I was planning ahead…

Brined Brisket

Tyler Florence to the rescue with a 5-star recipe whose brining instructions are “overnight or as long as 10 days.” Perfect.  I’ve got a few hours to spare now… My brisket choices were slim – I could choose between a 10 pound full cut of meat, or small 1.5 pound portions. I went with two of the smaller pieces and picked one flat end (leaner, tougher) and one point (fattier, more tender) for a total of 2 and 3/4 pounds of meat.

Get your brine and meat in a large ziplock bag, and forget about it in the fridge. The longer you can marinate the meat, the more pickled and flavorful it will be. Before you are ready to start cooking, drain and rinse the meat.

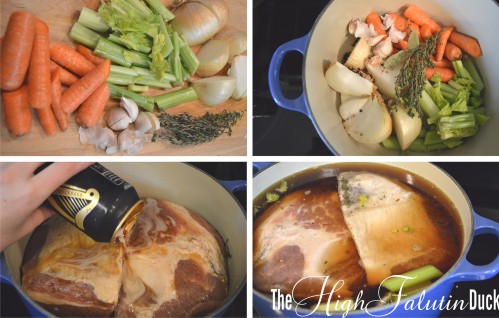
Braising Brisket

Since I’ve previously used the pre-brined brisket, I’ve always used the package cooking instructions (and the pitiful flavor pouch….). Typically the package wants you to do everything on the stove top – but Tyler says to put it in the oven. I’m going with the oven – just put the lid on, pop it in, and come back in 3 hours. No baby sitting to make sure the simmer is correct, and no temptation to peak at it (I get paranoid and feel the need to look every half hour…) I was a little disappointed that Tyler added only water to the braising liquid. Come on, it’s St. Patrick’s Day – a can of Guinness needs to be present in this meal (and no, I’m not counting the one I’m drinking…)

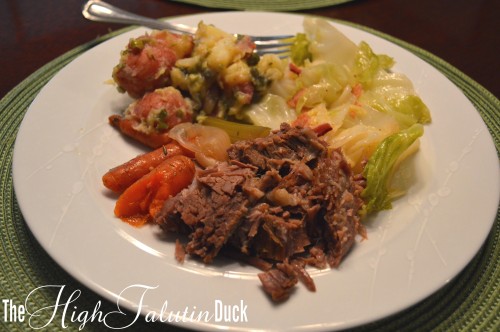
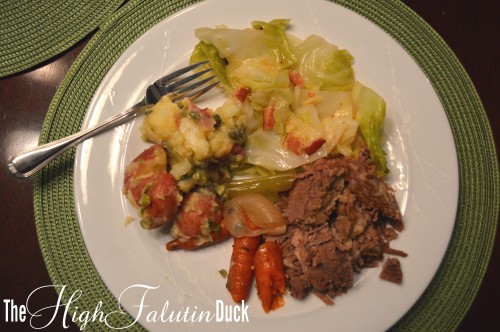
Corned Beef

As for serving this beefy goodness, cabbage is a must. The original recipe wants you to cook the cabbage along with the meat – but I am not into mushy cabbage. So instead I went with a quick saute of bacon, garlic and a full head of green cabbage. And then I made French Potato Salad. Yep, I did. And I received multiple scowls of disapproval from my English Father-in-Law who requested boiled potatoes. I did boil them….then I slathered them in a vinegar-mustard-caper-green onion vinaigrette.  And then everybody forgot that I had bastardized this Irish dinner with a French side dish :)

Corned Beef Brisket Brine

  • Water
  • 1 cup kosher salt
  • 1 cup brown sugar
  • 1 1/2 tablespoons whole coriander
  • 1 1/2 tablespoons whole mustard seeds
  • 1 1/2 tablespoons whole black peppercorns
  • 1 1/2 tablespoons whole allspice
  • 4 sprigs fresh thyme leaves
  • 2 bay leaves
  • 1 (2 1/2 to 3 pound) brisket

Combine 1 cup water, salt and brown sugar. Whisk until sugar and salt have dissolved. Put water mixture and all remaining ingredients into a large ziplock bag. Add enough cold water to cover meat. Brine in the refrigerator overnight or up to 10 days (I did 2 and a half days).

Corned Beef Brisket

  • 3 tablespoons extra-virgin olive oil
  • 1 onion, halved
  • 4 carrots, chopped
  • 4 stalks celery, chopped
  • 1 head garlic, halved
  • 3 sprigs fresh thyme
  • 2 bay leaves
  • 2 tsp. whole peppercorns
  • 2 tsp. mustard seeds
  • 2 tsp. coriander seeds
  • 1 tsp. salt
  • 1 tsp. allspice
  • Brined brisket
  • 1 can Guinness (16 oz.)
  • water to cover

Heat oil in a large dutch oven or heavy bottomed pot. Add in vegetables and seasonings, saute until softened (about 10 minutes). Place meat over vegetables. Pour in Guinness and enough water to cover meat. Bring to a boil, cover, and reduce to a simmer. Simmer for 15 minutes. Then cook in a 300F preheated oven for 3 hours. Remove meat from cooking liquid and allow to rest for 20 minutes before serving. Slice meat against the grain.

Recipe adapted from Tyler Florence’s Corned Beef and Cabbage

Pulled Pork, Coleslaw and Baked Beans

It’s a nice lazy Sunday. We are watching the Daytona 500 – no, that’s not true. The Man is watching the Daytona 500, and I’m keeping busy, not paying attention to the endless left turns on TV. But we are both salivating to the aromas of pork butt roasting in the oven. It’s been in there since 8 this morning, and I am about to eat my arm….  But it’s almost done and we are fixing to grub hard on some pulled pork and fixins! Here are the recipes so that you can do the same.

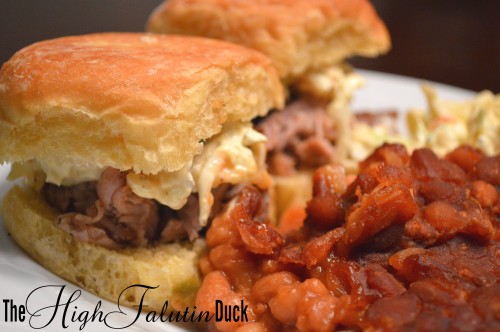
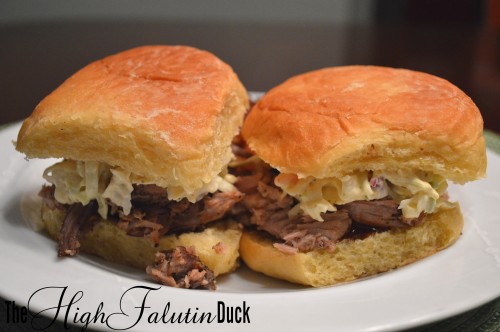
Sliders and Baked Beans

Pulled Pork Sliders

Brine2

Brine

  • Boston Butt (4-6 pounds, bone in)
  • 4 C. water
  • 1/4 C. salt
  • 1/4 C. molasses
  • 2 tsp. peppercorns
  • 2 garlic cloves, smashed

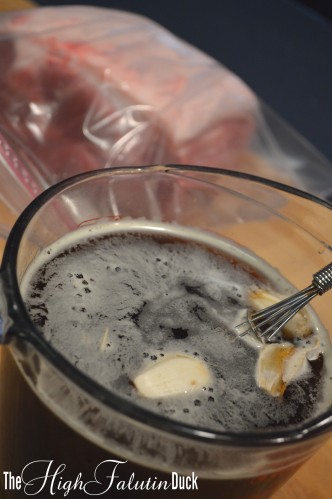
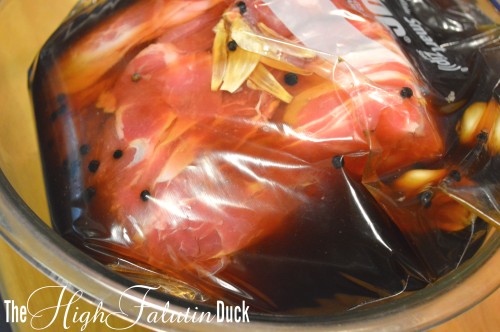
Combine water, salt and molasses, stir until salt is dissolved. Add in peppercorns and garlic. Place meat in a zip top bag and pour in brine. Squeeze air out of bag, seal, and place in the fridge. Allow meat to brine for at least 6 hours.

Brine

Dry Rub

Pork Seasonings

  • 1 T. salt
  • 2 T. black pepper
  • 1 T. onion powder
  • 1 T. garlic powder
  • 1 T. paprika
  • 2 tsp. curry powder
  • 1/4 C. brown sugar

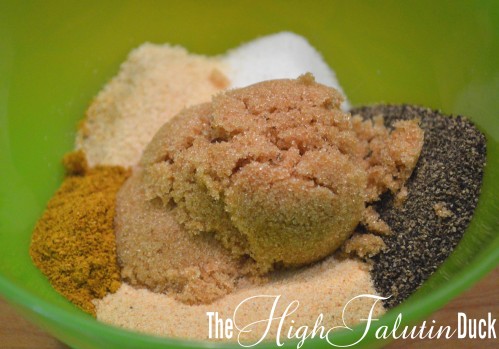
Combine all ingredients. Remove meat from brine, and pat dry with a paper towel. Rub seasonings onto all sides of the meat.

Pulled Pork

Pulled Pork

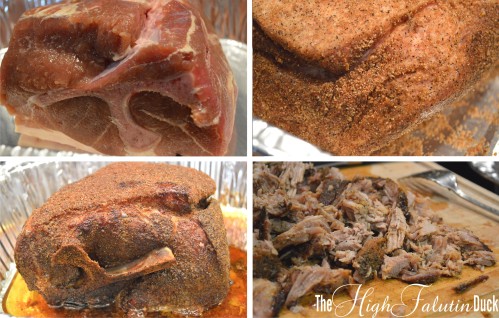
Take pork out of the fridge, and allow it to warm up for an hour. Place meat, fat cap up, in a roasting pan. Bake, uncovered in a 225F oven for 1.5 – 2 hours per pound or until internal temperature is 170F*. Outside will appear dry, and meat will be pulling away from bone. Remove from oven, and allow to rest for up to an hour. Remove fat cap, then shred pork with 2 forks.

*Pork is technically “done” when it reaches an internal temperature of 145F. But we don’t want “done”. We want the fat and connective tissue to melt away, which begins when the meat reaches 145F. Continue cooking until you get around 170F for succulent meat that is easy to pull. 

Assembly

  • Pulled Pork
  • Mini potato buns
  • BBQ sauce
  • Coleslaw

Put 1 to 2 Tablespoons of BBQ sauce on bottom bun. Top with pork and coleslaw.

Pulled Pork sliders

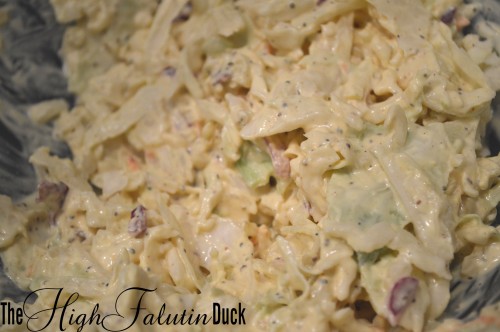
Coleslaw

Coleslaw

Before having a toddler, I would shred my own cabbage for coleslaw. But now that my time is more valuable, I buy a pre-shredded package of tri-color coleslaw mix (which includes green and red cabbage and carrots). If you want to shred your own, I suggest using a mix of 1/2 savoy cabbage, 1/4 green cabbage, and 1/4 red cabbage.

For best results, mix your coleslaw early in the day. This gives the dressing time to soften your cabbage.

  • 1 Lb. shredded cabbage
  • 1/2 C. mayonnaise
  • 1/2 C. sour cream
  • 4 T. whole grain mustard
  • 4 T. yellow mustard
  • 2 T. sugar
  • 2 T. apple cider vinegar
  • 1/2 tsp. salt
  • 1/2 tsp. pepper
  • 1/2 tsp. celery seeds

Combine all ingredients. Mix until cabbage is completely coated. Cover and refrigerate for at least 2 hours before serving.

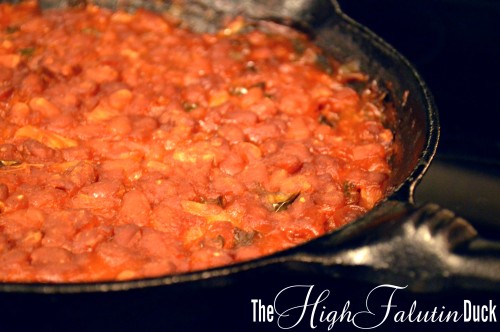
Baked Beans

Best Baked Beans

The Pioneer Woman has a recipe titled “The Best Baked Beans“. And she ain’t lying. In fact, I don’t even like baked beans…but I’ll eat these by the bowl full! A few notes on the preparation. First – I do everything in a cast iron skillet, making this a one-pot meal. Cook the bacon, then the veggies, and finally add the remaining ingredients and bake – right in the skillet. Unless you are making a huge batch…then you may need to pour the beans into a bigger vessel for baking. Second – I use Van Camp Pork n’ Beans. And I’m not sure why, but the largest cans seem to be 1/4 liquid and only 3/4 beans. So even if I’m doing a larger batch, I go with the smaller (32 oz. and less) cans. You pay more per ounce, but you get more beans in the long run. Third – sometimes (like today) I skip the bacon. I don’t always feel like the extra cholesterol and fat. Just use 1 Tablespoon to saute your veggies in.

Meat & Potatoes

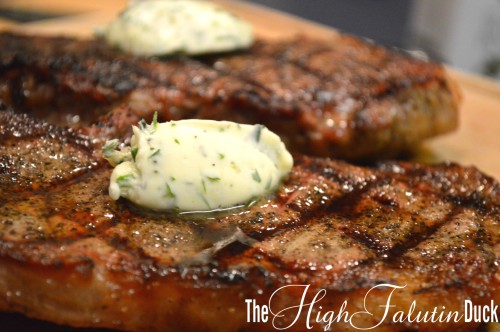
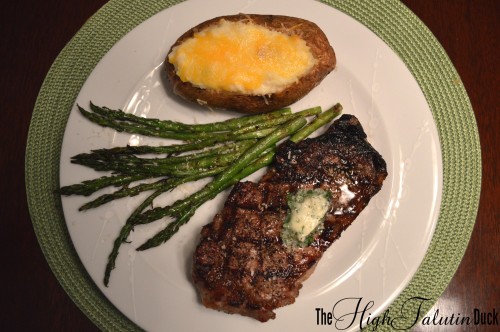
One of the many advantages of living in Savannah – you can grill (comfortably) in every month of the year. And grilling is by far, in my opinion, the best way to go about cooking meat. Tonight it was a peppered New York strip, topped with garlic herb butter – and it was tender and juicy on the inside, with a little char on the edges. Or as I would call it – perfect ;)

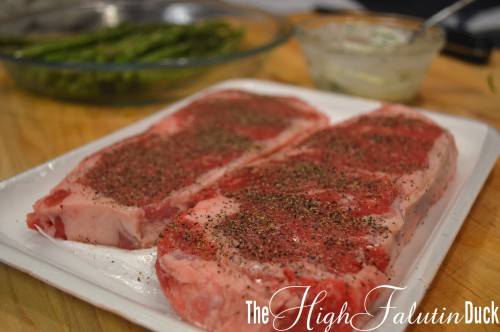
peppered steaks

When it comes to seasoning a good steak, I think simple is best. If you enjoy steak like I do, then you want the seasonings to enhance the flavor of the meat – not mask them. Before these steaks go on the grill, the only thing I put on them is pepper – a nice even sprinkling on both sides. Once they come off the grill, I like to hit them with a little coarse salt and a nice scoop of garlic herb butter. As the steak rests, the butter melts, and the flavors all mingle nicely.

garlic herb butter

Every juicy steak needs a good potato at it’s side. Whether it’s baked, mashed, scalloped or fried – meat and potatoes go hand in hand. Although I think that the baked potato is a worthy side dish, they are hard to enjoy after you’ve indulged in a twice baked potato. With the addition of butter, bacon, seasonings, etc., the baked potato transforms into loaded mashed potatoes in a salted potato skin. And that is real hard to turn back from.

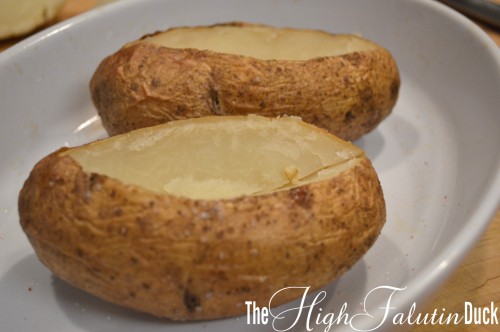
Start your potatoes by lightly brushing the skin with olive oil, and sprinkling both sides with a little coarse grain salt. I like to bake mine for at least an hour – to make sure they are good and fluffy. Once the potatoes are done, take them out and let them cool. This is the hardest part for me….I am ALWAYS juggling a hot potato thinking damn, I should’ve just waited longer! 

baked potatoes

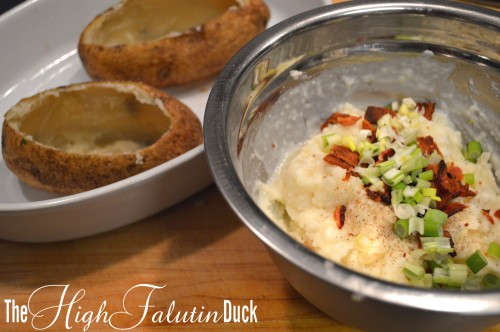
Once your potato has cooled (or you are ready to play hot potato) you’ll want to use a sharp knife to open the top. I cut a V-shaped canal from end to end, and pop the top off. Next, you use a spoon to scoop out the filling. You want to get most of the potato out, but you don’t want to scrape the walls too thin. Leave about 1/8″ wall – this will keep the skin from tearing and the potato from losing it’s shape. Put all the insides in a small bowl, and get ready for some toppings.

Potatoes, Twice Baked

What you put (or don’t put) in your potato is completely up to you. My preference in butter, sour cream, cream cheese (don’t worry, it’s just a little of each), bacon, green onion and Cajun seasoning. Other awesome toppings would be sauteed onions, mushrooms, steamed broccoli, or ranch dressing. I start with the butter and cream cheese so that the hot potato melts them down. Use a fork, and try not to mash too much. To keep a nice fluffy texture, you don’t want to overwork or over-mash. Next you fold in your choice ingredients until it’s thoroughly mixed. At this point, I like to add milk. Only a Tablespoon or so – to give the filling the consistency of thick mashed potatoes.

Finally, you spoon the filling back into the potatoes, top it off with a little cheese, and back in the oven they go. Uh oh – did you end up with too much filling for your potatoes? Not to worry – get out a fork, and eat it up. You might want to eat the top parts you removed from the potatoes earlier too – because they are good!

Twice Baked Potatoes, NY Strip, Asparagus

To finish off this meat and potato meal, we need to add something green. We hadn’t has asparagus in awhile, and I love the way is tastes grilled. Tossed with a little olive oil, seasoned with salt and pepper, and grilled for a few minutes – asparagus makes a quick and healthy side.

Grilled Peppered Steak

  • New York strip (about 1 inch thick)
  • pepper
  • coarse salt
  • Garlic Herb Butter

Season steak liberally with pepper on both sides.

Heat up your grill on high. Place steaks on the grill, and turn the heat down to medium-high. After 4 minutes, rotate steaks 45 degrees, in order to get nice grill marks. Cook for another 4 minutes, then flip them over. For medium temperature, cook the steaks for an additional 4 – 5 minutes. (Cooking times vary depending on thickness of steak.)

Remove from heat and allow to rest on a plate or cutting board. Season with coarse salt. Place a rounded teaspoon of garlic herb butter in the center. Steaks should rest for about 10 minutes.

Garlic Herb Butter

  • 4 T. Butter, softened
  • 1 garlic clove, minced
  • 1 tsp. parsley, minced
  • 1 tsp. thyme, minces

Combine all ingredients and mix thoroughly. Set aside until needed. Refrigerate any unused butter for a week. Or freeze for months.

Twice Baked Potatoes

  • 2 medium baking potatoes
  • 1 T. butter
  • 1 generous T. sour cream
  • 1 generous T. cream cheese
  • 2 slices bacon, cooked and crumbled
  • 1 green onion, minced
  • 1/4 tsp. Cajun seasoning
  • salt and pepper to taste
  • 2 – 3 T. milk
  • 1/4 C. shredded cheese, divided (cheddar, or Mexican blend)

Brush potatoes with olive oil, season with coarse salt, and place in a baking dish. Bake at 375 for an hour and fifteen minutes, or until cooked through. Allow to cool.

Use a sharp knife to cut a v-shaped canal in the top of each potato. Remove top and scoop out filling, leaving 1/8″ wall. Scoop the filling into a small bowl, and melt in butter and cream cheese. Gently fold in sour cream, bacon, green onion, and seasonings. Once combined, add milk to get the consistency of thick mashed potatoes.

Spoon filling back into each potato. Top with 2 T. of cheese. Bake at 375 for 15 – 20 minutes, or until cheese is melted and filling is warmed through.

Sunday Chili

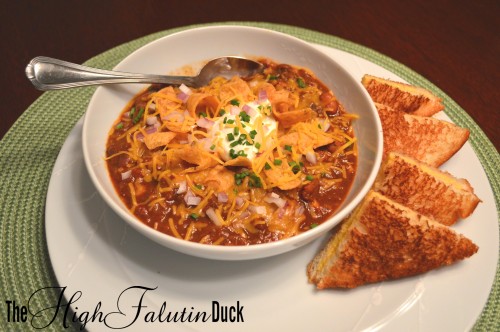
chili

Every year I look forward to the start of football season and the first signs of cooler weather (Savannah summers are no joke). Football and Fall invoke a craving in my belly that just doesn’t exist when it’s hot and sticky out – and that craving is for Chili! Well now we’ve come to the end of the season (at least for my team, who has no chance at going to the play offs) and it’s even colder out – high in the low 50’s (that’s cold for me!) and that Chili craving is stirring! So let’s get to it…

The complete recipe, with measurements can be found at the bottom of the post

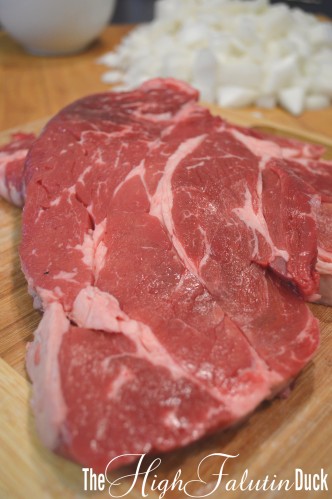
Put the ground beef away – this is a serious chili recipe. And serious chili requires steak. Bottom round, chuck roast, sirloin – any cut with a little marbling and connective tissue. I usually go with what’s on sale. Today it’s boneless chuck steak.

chuck steak

Put the meat in the freezer for about 20 minutes, and get the rest of your ingredients prepped. If you bought already cubed “stew meat” then skip this step. And hang your head in shame for buying the mysyery mix of off-cuts that was cubed at some nondescript time in history. Moving on…while you’re at the fridge, grab two dark beers (I use Guinness). One of these can be opened and drank. The other needs to sit out and warm up (it will be used to deglaze the pot).

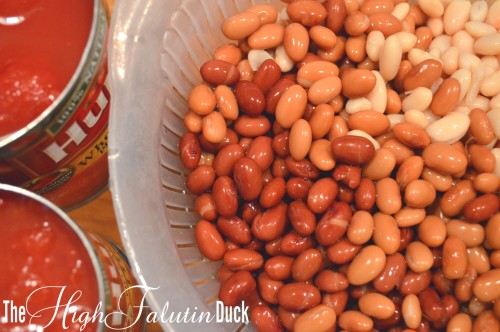
Dice up your bacon and rough chop the onions and garlic. Get your beans opened, drained and rinsed. I am using small red, Great Northern, and pinto. Feel free to use your favorite bean or combination. Open your tomatoes too, but keep them (and their juices) in the can until they are ready for the pot.

beans and tomatoes

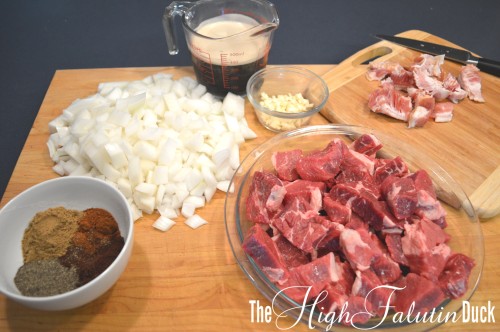
ingredients prepped

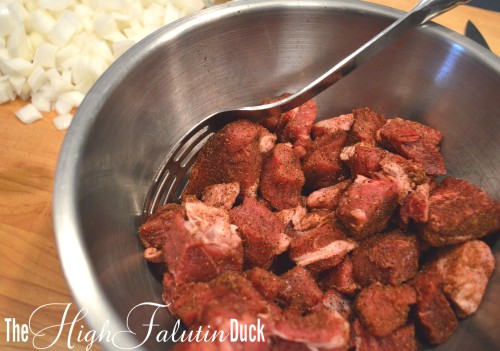
Without proper seasoning, chili is just meat and tomato sauce. So in a small bowl, mix together chili powders, cumin, black pepper and salt. Now that our meat has spent some time in the freezer, it should be easy to cut into cubes – no bigger than 2 inches. Toss the meat in 2 Tablespoons of the spice mixture, and shake off any excess.

seasoned steak

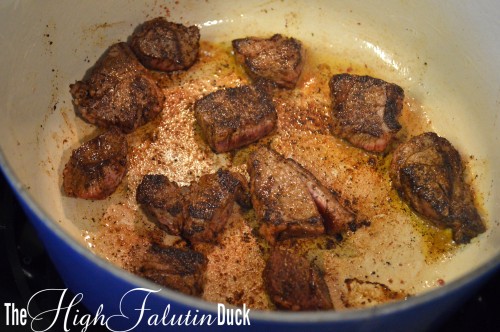
I like to use a Dutch oven – but any heavy bottom pan will work. Heat your pan on medium-high and get your bacon cooking. When it’s crispy and brown, move it to a plate with a slotted spoon. Pour off and reserve some of the fat – you only want a light coating in the pot. You may need more later, so don’t go throwing it away. Lower the heat some, and brown your meat in batches. Don’t overcrowd the pot – we want brown not boiled.

browning

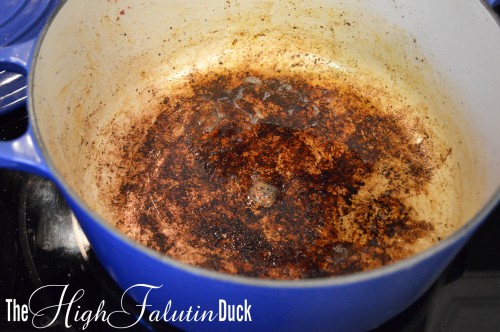
Transfer to a bowl and continue until all the steak is nice and browned. Add a little bacon fat as needed. Try not to rush this process – just like with pot roast, a good browning is key for flavor and texture. When your meat is done browning, your pan should look like this:

not burnt

No, it’s not burnt – that is flavor! Once the onions start to sweat, this yumminess will start to scrape up and infuse into the dish. And the beer will take care of getting the rest up.

Now turn the pan up to medium high and start your onions. You want them softened, with a little color. This should take about 5 to 10 minutes. When they are starting to brown, add the garlic and a 1 Tablespoon of the spice mix. Add about a teaspoon of salt too. Stir and cook for 2 – 3 minutes. Now is time for the beer. If you forgot and drank both beers from earlier, go ahead and pull out two more (clearly this recipe is making you thirsty…). Pour one beer into the pot, and use your wooden spoon to scrape up any tasty bits from the bottom. Allow the beer to simmer for a few minutes before you continue.

deglaze

Return the bacon and steak (with any juices that may have lurched out) to the pot. Also add in your tomatoes, beans, 5 Tablespoons of spice mixture and a teaspoon of salt. You will need to add 2 to 2 1/2 cups of water – just to cover all of the ingredients. I fill up my tomato can, no sense in throwing away that tomato residue. Give it a good stir and bring it up to a slow boil. Once bubbles start moving to the top, drop the heat to a simmer and put a lid on it.

not beef stewYes, it looks like beef stew at this point, but don’t worry. After 4 hours of simmering, everything in the pot will break down and melt in your mouth. Now go watch the game and finish that beer. Oh, you already finished it? Well get another, but take it easy….we don’t want to forget about that pot of spicy goodness on the stove….

Check your pot every half hour or so, and stir the chili. After an hour to an hour and a half, remove the lid and raise the heat a little. We want to let the liquid reduce slowly. The total simmering time should be 4 to 5 hours. If the liquid is evaporating too quickly, put the lid on and reduce the heat. If it’s too slow, take the lid off. Just keep stirring and checking….but make sure you maintain a slow simmer and do NOT boil. Don’t forget to do a taste test every now and then too. You should have some leftover spice mixture, and you could always use a dash (or a Tablespoon…) of Tabasco sauce – taste and season as needed.

About 3 hours into the simmering, take a few minutes to inspect your meat. At this point, it has cooked long enough (and slow enough) to break down the connective tissues – but it may need a little help breaking apart. Use your wooden spoon to gently separate the meat – pressing it into the side of the pot is ideal. You shouldn’t need a lid for the last hour of cooking. But keep an eye on the pot, and stir regularly. Below is what the chili should look like at the halfway point.

half-way

Seeing as our chili is almost done (thank God, I am drooling on my keyboard) we should probably talk about toppings and accompaniments. The options for chili toppings is vast. Personally, I like shredded cheddar, sour cream, chives, diced onion, and a handful of Fritos. The Man (not a sour cream lover) likes cheddar, and Fritos only. “That’s all it needs” he says. He knows how to flatter the cook ;) As far as accompaniments – I like a cold beer and a grilled cheese sandwich.

About the grilled cheese….forget everything I told you yesterday about grilled cheese sandwiches. This IS you kid’s grilled cheese – white bread, butter, and American cheese, browned and melty to elementary school perfection. And it’s the ideal vessel in which to transport chili juices from your bowl to your mouth – we don’t want complex flavors to interfere with it’s sole purpose.

chili

  • 2 pounds steak, cubed
  • 6 ounces bacon, diced
  • 2 large onions, chopped
  • 4 cloves garlic, chopped
  • 12 ounces dark beer (Guinness)
  • 3 – 16 ounce cans beans
  • 1 – 28 ounce can whole plum tomatoes
  • 1 – 16 ounce can diced tomatoes
  • 4 Tablespoons chili powder
  • 3 Tablespoons chipotle chili powder
  • 3 Tablespoons cumin
  • 2 Tablespoons black pepper
  • salt to taste

Combine chili powders, cumin and black pepper in a small bowl. Toss cubed steak in 2 T. of spice mixture. Cook bacon in Dutch oven until crisp. Remove with slotted spoon, and pour off excess fat. Brown steak in small batches, transfer to a plate. Cook onions until soft and browning. Add garlic and 1 T. of spice mixture. Stir and cook for 2 to 3 more minutes. Deglaze the pot with beer. Use a wooden to scrape the bottom of the pot. Raise the heat and let the beer cook for about 2 minutes. Return bacon and steak (with juices) to the pot. Add in beans, tomatoes, 5 T. of spice mixture, 1 t. of salt and enough water to cover (2 – 2 1/2 cups).

Bring to a boil, cover and reduce to a simmer. Stir chili every 30 minutes, removing lid and adjusting temperature as necessary. Taste and add seasonings and/or Tabasco as needed. Simmer for 4 – 5 hours, or until moisture has reduced and meat has shredded. Serve with shredded cheddar cheese, diced red onions, sour cream, chives, Fritos, or oyster crackers.